Brownie Cookies (for ice cream sandwiches)
These melt in your mouth brownie cookies for ice cream sandwiches have everything you love about brownies, fudgy, crackle top, chocolatey goodness in cookie form with crisp edges. They are perfectly paired with the Cookie Dough Ice Cream I posted earlier this week, especially for celebrating Father’s Day this weekend.
Why I Love These Cookies
These are not my usual go to big, soft, and doughy cookies, they are flat and irresistibly chewy. Gasp. I’m sharing a flat cookie recipe. Who am I??
What these brownie cookies for ice cream sandwiches lack in height they make up for in texture and flavor. With a robust chocolate flavor, these brownie cookies are delicious, soft, and chewy. I use brown butter to elevate the flavor of 3 different types of chocolate I use in this recipe.
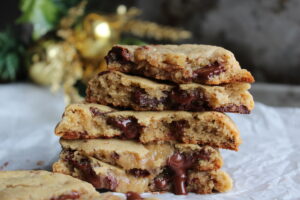
Crisp and chewy edges are necessary when making ice cream sandwich cookies. The edges will soften from the ice cream and make a wonderful bite without the cookie falling apart or being too gooey. I love how the tops of the cookie form a beautiful crackle top, it makes them so fancy.
The fudgy center of this cookie is amazing. Trust me, you will be blown away. It’s just like taking a bite out of a fresh baked brownie.
These brownie cookies for ice cream sandwiches don’t require many ingredients and come together quickly. The most important step is making sure the eggs are well beaten and fluffy to achieve the crackly thin tops.
I am using these to make ice cream sandwiches, but these are wonderful eaten as is. You can also sprinkle them with a little bit of flaked sea salt prior to baking if you like a salted dark chocolate moment. Especially with a hot cup off coffee for breakfast? Yes, please.
Ingredients You Need
-Butter- I am again using Browned Butter. I know. I am a menace. It really does amplify the flavor of the cookies if you have it on hand or have the time to make brown butter. Not to worry though, regular unsalted butter will yield amazing results as well.
-Sugar
-Dark Chocolate- you want to use a quality dark chocolate for this cookie, it will make a difference in the depth of chocolate flavor. I used a couple different varieties including Guittard and Madhu Chocolate.
-Eggs-room temperature eggs work best.
-Flour
-Baking Soda
-Salt-extra flaked sea salt can be used prior to baking the cookies for a salted chocolate moment. My husband is not a fan of salted chocolate like I am, so I am omitting from this recipe.
-Unsweetened Cocoa-you can also use Dutch processed cocoa. Make sure it doesn’t have any added sugar.
-Black Cocoa-this cocoa has less acidity and gives a beautiful dark color to these cookies. You can use Dutch processed cocoa in its place, but the cookies won’t be as dark. I use the King Arthur Brand of black cocoa; I highly recommend it.

Let’s Make Brownie Cookies for ice cream sandwiches
The most important part in the process of making brownie cookies for ice cream sandwiches, is making sure your eggs are whipped up nice and frothy. This step will help you achieve that shiny, thin, tissue paper-like crinkle on top of the cookies that is reminiscent of brownies. Make sure you are using room temperature eggs as they will whip up faster.

I usually rely on my stand mixer to make all my recipes, but with this one I would highly advise using a handheld mixer or whisking by hand with a large whisk. The reason for this is because there isn’t enough volume of eggs to properly whip and froth them in a stand mixer. There is a little gap between the whisk attachment and the bottom of the metal bowl in my stand mixer. I find that some of the egg just kind of stays there, trapped, and doesn’t get to its full fluffy potential. This undermixed egg will not let us achieve thin crackle top on this cookie and we definitely don’t want that since it is the best part!
Making Brown Butter
Start by preheating your oven to 350*F as you get the dough ready.

I start off by melting brown butter on the stove for a few minutes until it is hot. I add in the chopped dark chocolate and stir over low heat until it is melted through. Take off the heat when most of the chocolate has melted. I do this because the residual heat in the pan will continue to melt the remaining chocolate pieces without the risk of it getting too hot and burning. Once the chocolate is melted into the butter set aside to cool slightly.
Just Keep Whisking
In a large bowl with a whisk or hand held mixer, combine room temperature eggs, sugar, vanilla extract and salt. Whisk on high or very aggressively by hand, for at least 5 minutes until your mixture is thick and creamy. I whisked by hand because I wanted to feel the burn, I wanted to be reminded that I could still do it and feel like a total boss in the kitchen. Brownie cookies have this sort of effect on me.
Whisk in the instant espresso powder. This ingredient is optional, but it does deepen the flavor of the dark chocolate we are using.
If whisking by hand, you are almost done, you beast. You will want to place your bowl on a wet kitchen towel for this next part, so the bowl is secure and not moving all over your counter. Very very slowly, as you are also whisking at the same time or using a handheld mixer on medium high, slowly drizzle in the cooled but still warm chocolate butter mixture into the egg mixture. You want to keep the egg mixture light and fluffy while doing this because that is what is going to give you shiny crackle tops on your brownie cookies.
The batter looks smooth and shiny after the chocolate and butter mixture is added.
Add Dry Ingredients
In a separate bowl, sift together flour and both types of cocoa powder then carefully fold into the egg and chocolate mixture with a large spatula.

The dough will be thick and shiny and very closely resemble brownie batter. Grab your prepared baking pans with parchment paper. With a 1 ounce cookie scoop, scoop brownie cookies onto trays. You can also use a tablespoon if you don’t have a scoop. I left quite a bit of space between each cookie since these will spread out quite a bit during baking. I was able to fit 6 cookies per tray.
**I spaced out during the first batch of scooping these cookies, which is why you see these monsters in the pictures here. I used a 3 ounce cookie scoop instead of the one ounce cookie scoop to get a cookie that was as big as my hand. If you want to achieve giant ice cream cookie sandwiches that will feed 3-4 people each, use a 3 ounce cookie scoop and only bake 4 per baking tray. You may need more ice cream though to fill them but they will be giant. And epic.**

Bake one tray at a time for 10-12 minutes. The brownie cookies will look soft when you take them out of the oven, but they will firm up and continue to bake after being taken out.

Let cool on the baking trays for at least 5 minutes. These cookies don’t have very much flour, so they are delicate when they are warm. Carefully move cookies to a rack to cool. I use a wide pancake spatula to ensure I don’t crack any of the edges.

Cool cookies completely before assembling ice cream sandwiches. Cold cookies are easier to work with and won’t melt and fall apart when handling. You can also place the cookies in the fridge for 10-15 minutes if your kitchen is too warm for them to cool.
Brownie Cookie Ice Cream Sandwich Time!
Ok, it’s time to build some brownie cookie ice cream sandwiches. I take out my Cookie Dough Ice Cream I made earlier in the week and let it sit on the counter for 5-10 minutes.
Cut the Ice Cream
Using a 3 inch cookie cutter (you can also use a biscuit cutter) and a bowl that you can dip the entire cookie cutter in to. Fill this bowl up with an inch or two of very hot tap water. The key to perfect ice cream cookie sandwiches is using a hot cookie cutter to slice through the cookie dough in the ice cream. Frozen cookie dough is very hard to cut through so the heat of the cookie cutter will help us glide right through it. Using this technique will give you smooth and glossy ice cream edges for your ice cream sandwiches.

If you don’t have a round cookie cutter you can also use a 3oz cookie scoop that is also sitting in very hot tap water to scoop out ice cream onto the cookies. Place one scoop of ice cream on the bottom of a brownie cookie then top with another cookie. Carefully press down so the ice cream almost reaches the edges of the cookies and freeze. I am making these for Father’s Day gifts so I wanted to put extra effort into making these picture perfect. But this technique works well too.
I was also thinking, this could make a great activity for an ice cream party. Create a build your own ice cream sandwich bar with the ice cream and ice cream scoops in the middle, brownie cookies on a large tray, then little cups of sprinkles, chocolate chips, caramel, candy, fresh fruit, etc. I may have to do this soon!

Ready, set, GO!
Back to ice cream cookie sandwiches. So you want to be quick with the assembly, especially if your kitchen is warm. Get the cookies ready by flipping over half of them, place a round of ice cream on top of the overturned brownie cookie, then top with another cookie so the crackle top is showing. Place them back onto the tray then straight back into the freezer. If you notice the ice cream is getting too soft just pop everything back into the freezer for 10-15 minutes, then continue to assemble.

You can also roll the ice cream sandwich edges in sprinkles, nuts, chocolate chips, candy, etc. that you like for a fun decorative edge. I like to see the cookie dough bits on the edges, so I left them bare.

Freeze
Allow these to freeze for a couple hours, preferably overnight if you are storing them to eat later. Wrap the brownie ice cream sandwiches in wax paper or place in a sealed bag or container after they are frozen solid. They will stay fresh in your freezer for up to 3 months.

You can also eat them after you make them. They will be soft and melty and make the most memorable and delicious dessert. Yum!
If you try this recipe and love it as much as I do, please tag, follow, and like @sunshinetxcookies on Instagram and Facebook. New posts every Tuesday and Thursday so be sure to follow me for more delicious cookie recipes. Happy Baking!

Brownie Cookies (for Ice Cream Sandwiches)
Ingredients
- 1½ cup chopped dark chocolate or dark chocolate chips
- 1 stick unsalted butter
- 2 eggs room temperature
- ¾ cup granulated sugar
- 1 cup Flour
- 2 tbsp unsweetened cocoa powder
- 1 tbsp black cocoa powder
- 1 teaspoon vanilla extract
- 1 tspn instant espresso powder optional
- ¾ tspn baking soda
- ¼ tspn salt
Instructions
- Preheat oven to 350*F. Prepare baking trays with parchment paper for scooping cookies.
- In a small sauce pan melt butter. Add all of the chocolate and stir to melt of low heat. When most of the chocolate is melted, take off the heat. The residual heat will continue to melt the remaining chocolate.
- Let cool slightly while you get the eggs ready.
- In a medium bowl beat eggs, sugar and vanilla extract with a handheld mixer or by hand with a whisk until pale and foamy. This usually takes 3-5 minutes.
- Add in espresso powder and continue to whip.
- While whisking very fast, slowly pour in the melted butter and chocolate mixture until it is all incorporated. You want to make sure to continue to whip the egg mixture vigorously while adding to keep the mixture light and frothy.
- With a sieve, sift flour, baking soda, salt, and cocoa powders on top of the chocolate mixture.
- With a spatula carefully fold in the dry ingredients making sure not to be too rough. Your dough will resemble thick and shiny brownie batter.
- Using a 1 ounce scoop, scoop 6 cookies per baking sheet. You will want to scoop as many as you can. If you have 4 baking sheets, scoop all the batter at one time onto the trays. This will help preserve the crackle crust on the cookies.
- Bake cookies for 10-12 minutes, making sure not to overbake. They will look slightly underdone and soft in the middle.
- Cool on pan for at least 5 minutes before carefully moving to a wire rack to finish cooling. You can sprinkle sea salt on top while they are still warm.
Ice Cream Sandwiches
- Brownie cookies need to be completely cooled before assembly.
- Remove ice cream from freezer 5 minutes before you start to allow it to soften slightly.
- Using a 3 inch cookie cutter or biscuit cutter, place into a bowl of hot water. You will need the hot water to warm up the cookie cutter so it will cut through the frozen cookie dough pieces.
- Cut out 12 circles of ice cream and place on the bottom of brownie cookie, placing another brownie cookie on top.
- Place brownie cookie ice cream sandwiches immediately in the freezer for at least an hour to set up, or enjoy them soft and melty. They are delicious!